Rental homes often come with one big decorating challenge: blank walls you’re not allowed to drill, paint, or permanently change. This usually leaves rooms feeling unfinished, temporary, and less personal, even when the furniture is styled well.
The good news is that renter-friendly wall décor makes it possible to create a warm, designed, and premium-looking home without risking your security deposit.
The most effective approach is to style the walls room by room, because every space in a rental solves a different problem:
- living room walls need a focal point
- bedroom walls need softness behind the bed
- entryways need practical mirrors
- hallways need vertical styling
- kitchens need wipeable wall upgrades
- home offices need clean video-call backdrops
- balconies need lightweight vertical décor
Instead of forcing the same décor style into every room, a room-by-room method helps you choose the safest and most useful no-damage solution for each wall type.
The best renter-safe options include:
- peel-and-stick wallpaper
- removable hooks
- Velcro picture strips
- leaning mirrors
- adhesive photo tiles
- fabric hangings with tension rods
- plug-in sconces
- removable backsplash tiles
- vertical plant grids
These ideas help renters:
- personalize plain walls
- improve small-space layout
- add warmth without furniture bulk
- make rooms feel finished
- create stylish apartment backgrounds
- move everything easily to the next home
The key is choosing décor that matches the room’s function, wall surface, humidity, and weight limit.
In this guide, you’ll learn 10 room-by-room renter-friendly wall décor ideas that are practical, no-damage, and easy to move when your lease ends.
Why Room-by-Room Rental Wall Styling Works
Room-by-room rental wall styling works because every space in a rental apartment has a different wall problem and a different functional need. Using the same wall décor solution everywhere often leads to clutter, weak focal points, or damage risk.
A space-based approach helps renters style smarter while keeping every wall portable, purposeful, and landlord-safe.
1) Solves Different Wall Problems by Room
Each room needs a different type of wall upgrade.
Examples:
- living room → needs a focal wall behind the sofa
- bedroom → needs softness or headboard-style styling
- hallway → needs vertical décor that saves width
- kitchen → needs wipeable removable surfaces
- home office → needs clean video-call backgrounds
- bathroom → needs humidity-safe décor
- balcony → needs lightweight vertical styling
This makes the décor more useful than decorative-only choices.
2) Prevents Overdecorating Small Rentals
Rentals often have limited wall space.
When users style room by room, they naturally:
- choose one focal wall
- avoid too many tiny frames
- keep traffic walls open
- use vertical height better
- reduce visual clutter
This is especially useful in studio apartments and 1BHK rentals.
3) Helps Small Spaces Feel Zoned
Wall décor can visually define how a room is used.
Useful zoning examples:
- wallpaper behind sofa = lounge zone
- fabric headboard = sleep zone
- photo tiles near desk = work zone
- backsplash tiles = kitchen prep zone
- vertical plant wall = balcony relaxation zone
This makes compact rentals feel more intentionally designed.
4) Makes Decorating More Portable
Room-based décor is easier to move during shifting.
Portable solutions include:
- leaning mirrors
- peel-and-stick wallpaper
- fabric tension-rod panels
- adhesive photo grids
- removable canvas art
- plug-in wall lights
These can move room by room into the next apartment.
5) Keeps Everything Landlord-Safe
Different walls need different no-damage methods.
Useful safety matching:
- painted walls → Velcro strips
- tile walls → removable adhesive tiles
- window frame walls → tension rods
- hallway walls → photo tiles
- humid bathroom → lightweight acrylic art
This lowers paint-peel risk.
6) Supports Better Styling Flow Across the Home
A room-by-room system helps repeat colors and materials more intentionally.
Useful flow ideas:
- repeat black frames
- repeat oak tones
- use the same linen texture
- repeat neutral wallpaper palette
- use matching warm plug-in sconces
This helps the rental feel cohesive.
Room-by-room rental wall styling works best because it improves function, safety, portability, and visual zoning while keeping the entire apartment easy to personalize.
Damage-Free Hanging Basics Before You Start
Before decorating any rental wall, it’s important to understand which hanging method is safest for each room and wall surface. The wrong adhesive, wrong weight, or wrong wall finish can peel paint and risk your security deposit.
Starting with the right basics helps renters style confidently without damage.
1) Choose the Right No-Damage Tool
Different wall décor needs different renter-safe tools.
Best practical options:
- Command strips → framed art, lightweight mirrors, canvas
- Velcro picture strips → gallery walls, photo tiles, office art
- removable hooks → macramé, lightweight baskets, string lights
- washi tape → posters, prints, dorm-style grids
- tension rods → fabric headboards, textile dividers
- leaning décor → oversized mirrors, large canvas, floor art
- over-the-door hooks → mirrors, vertical organizers, fabric displays
Choose the tool based on weight + room function.
2) Follow Weight Limits Carefully
This is one of the most important renter safety rules.
Useful guide:
- paper prints → tape or light strips
- framed art → Velcro picture strips
- mirrors → leaning floor mirror is safest
- fabric hangings → removable hooks or rods
- heavier décor → use floor-based leaning instead of adhesive
Never guess the weight.
Always check the packaging limit before hanging.
3) Check the Wall Surface First
Adhesives perform differently on different walls.
Best surfaces:
- smooth painted drywall
- glossy laminate panels
- tile backsplash
- glass partitions
- wardrobe sides
Risky surfaces:
- dusty matte walls
- textured plaster
- damp paint
- peeling old paint
- rough concrete walls
This helps prevent adhesive failure.
4) Clean the Wall Before Applying Anything
A dirty wall reduces grip strength.
Useful cleaning rule:
- wipe with dry microfiber first
- use light alcohol wipe if paint allows
- ensure the wall is fully dry
- avoid oil-based cleaners
This helps adhesive strips hold longer.
5) Avoid Humid or Heat-Prone Walls
Some walls weaken adhesive faster.
High-risk zones:
- near kitchen stove
- bathroom shower wall
- AC condensation wall
- direct sunlight window wall
- balcony rain splash zone
Use moisture-safe removable tiles or acrylic art in these spaces.
6) Let Adhesive Set Before Adding Weight
A common renter mistake is hanging the item immediately.
Useful method:
- apply strip
- press firmly
- wait recommended curing time
- then attach the frame or panel
This improves hold strength.
7) Test Removal in Hidden Spots
This is highly useful for deposit safety.
Before large décor:
- test one strip behind a console
- try on hidden wardrobe side
- test wallpaper corner near furniture
This helps check paint compatibility.
Damage-free wall styling works best when the tool, weight, wall finish, and room conditions are matched correctly before decorating.
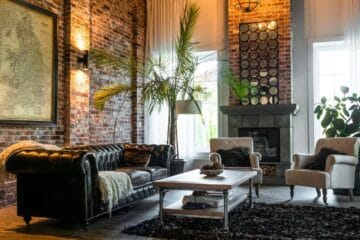
1. Living Room: Peel-and-Stick Accent Wall Behind Sofa
A peel-and-stick accent wall behind the sofa is one of the easiest ways to make a rental living room feel designed without drilling, painting, or permanent wallpaper. It creates a clear focal point, helps zone the seating area, and adds depth to the largest visible wall in the room.
This idea works especially well in:
- studio apartments
- 1BHK living rooms
- open-plan rentals
- neutral sofa walls
- TV + sofa combo rooms
- compact city apartments
Why This Idea Is Useful
The sofa wall is usually the main blank wall in a rental. A removable accent layer makes the room look intentional without needing multiple frames.
This idea helps:
- create a focal wall
- define the lounge zone
- add color or texture without paint
- make small rentals feel premium
- reduce the flat look of plain white walls
- improve video-call backgrounds from the sofa side
This is especially practical when furniture is minimal.
Best Wallpaper Choices
Choose renter-safe finishes that peel cleanly.
Best useful options:
- linen-look neutral wallpaper
- soft geometric prints
- vertical stripe wallpaper
- textured stone-look vinyl
- muted botanical patterns
- warm greige solid panels
For small rooms, subtle texture works better than busy prints.
Placement Rule
The wallpaper should stay only within the sofa zone.
Useful size guide:
- width should be slightly wider than the sofa
- stop the edges before nearby door frames
- keep top alignment clean with ceiling line
- hide lower edge behind sofa back if needed
This keeps the focal wall balanced.
Practical Styling Tip
Keep décor on top of the wallpaper minimal.
Best pairings:
- one oversized framed print
- slim wall sconce
- leaning side mirror
- textured cushions matching wallpaper tone
- floor lamp in one corner
This avoids overdecorating.
Application Safety Tip
For renters, wall prep matters.
Useful steps:
- clean wall fully
- test one corner first
- avoid freshly painted walls
- smooth bubbles with card edge
- do not stretch the wallpaper while applying
This helps clean removal later.
Mistake to Avoid
Avoid dark heavy wallpaper on a narrow rental living room.
This can shrink the space visually.
Instead:
- choose warm neutrals
- use vertical lines for height
- keep surrounding walls plain
- match wallpaper tone with sofa fabric
A peel-and-stick accent wall behind the sofa is highly useful because it creates a strong living room focal point, better zoning, and a premium rental look without risking paint damage.
2. Bedroom: Fabric Headboard Wall with Tension Rod
A fabric headboard wall with a tension rod is one of the smartest renter-friendly ways to make a bedroom feel softer and more finished without drilling into the wall. It creates the effect of a custom headboard or upholstered backdrop while staying fully removable and easy to move.
This idea works especially well in:
- rentals without a headboard
- small bedrooms
- studio sleeping zones
- guest rooms
- shared apartments
- dorm-style setups
Why This Idea Is Useful
The wall behind the bed is often the largest blank space in a rental bedroom. A fabric panel instantly adds softness and makes the bed area feel intentional.
This idea helps:
- create a faux headboard wall
- add warmth behind the bed
- reduce the temporary rental look
- soften echo in tiled rooms
- hide minor wall imperfections
- define the sleeping zone in studios
This is especially practical for beds pushed directly against plain walls.
Best Fabric Choices
Choose lightweight fabrics that hang smoothly.
Best useful options:
- linen panel
- cotton curtain fabric
- textured neutral throw
- block-print textile
- velvet-look lightweight panel
- woven tapestry cloth
Neutral fabrics work best for calm bedrooms.
Best Tension Rod Placement
The safest renter method is to use a window-style tension rod or extendable backdrop rod.
Useful placement guide:
- install slightly above headboard height
- width should match bed width or slightly wider
- let fabric drop to mattress level or floor
- keep the rod tightly secured between side walls, wardrobe edges, or vertical supports
This creates a clean faux headboard effect.
Practical Styling Tip
Connect the fabric tone with nearby bedding.
Best pairings:
- matching pillow color
- similar curtain tone
- boucle throw
- wood bedside table
- warm bedside lamp
- neutral rug
This makes the wall feel designed, not temporary.
Acoustic Benefit Tip
This idea is especially useful in:
- tiled bedrooms
- rooms with little furniture
- echo-prone studio spaces
- work-from-bedroom setups
The hanging fabric helps soften sound slightly.
Mistake to Avoid
Avoid using very thin transparent fabric.
This can look unfinished.
Instead:
- choose medium-weight linen
- use lined cotton
- use soft woven texture
- keep edges neatly steamed
A fabric headboard wall with a tension rod is highly useful because it creates a soft bedroom focal wall, faux headboard effect, and renter-safe sleep-zone styling without wall damage.
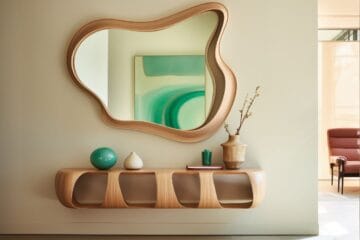
3. Entryway: Leaning Mirror + Small Art Grid
A leaning mirror paired with a small removable art grid is one of the most practical renter-friendly wall ideas for an entryway. It adds function, depth, and personality without needing heavy wall drilling, which is especially important in narrow apartment entrances.
This idea works especially well in:
- apartment entryways
- studio door zones
- narrow hall entrances
- hallway console walls
- rental foyers
- shared flat entrances
Why This Idea Is Useful
Entryways need both style and daily-use function. A leaning mirror solves both while keeping the setup portable.
This idea helps:
- create a quick outfit-check zone
- make narrow entrances feel wider
- bounce light into dark hallways
- add height without hanging weight
- personalize the wall with lightweight art
- create a finished first impression
This is especially practical where the door opens directly into the living area.
Best Mirror Choice
The safest rental option is a floor-leaning full-length mirror.
Best useful styles:
- slim black frame
- oak wood frame
- arched mirror
- thin brass frame
- frameless beveled mirror
Choose a mirror tall enough to visually lift the entry wall.
Best Art Grid Placement
The small art grid should stay above a console or beside the mirror, not directly behind the leaning mirror.
Useful layout ideas:
- 2×2 removable frame grid
- 3 vertical photo tiles
- one oversized print + 2 small frames
- clip grid with lightweight prints
Keep the full art zone within console width.
This keeps the wall balanced.
Practical Styling Tip
Use the lower zone for functional daily items.
Best pairings:
- slim shoe bench
- keys tray
- catchall bowl
- plug-in lamp
- small basket
- coat hook stand nearby
This turns the entry into a useful drop zone.
Safety Tip for Leaning Mirrors
This is highly important for renters.
Useful safety steps:
- use anti-slip pads under the mirror
- angle slightly against the wall
- keep away from swinging door path
- use optional removable anti-tip strip at the top
This prevents sliding without drilling.
Mistake to Avoid
Avoid using a very wide mirror in a narrow doorway path.
This can obstruct movement.
Instead:
- choose slim vertical mirrors
- keep art on one side only
- maintain walking clearance
- use lighter frame finishes
A leaning mirror with a small art grid is highly useful because it creates a wider-looking entryway, daily-use mirror function, and stylish first impression without damaging rental walls.
4. Hallway: Vertical Photo Tile Gallery
A vertical photo tile gallery is one of the best renter-friendly ways to decorate a hallway because it uses height instead of width, making narrow spaces feel styled without reducing walking space. Since most hallways in rentals are long and plain, this method adds personality while staying fully removable.
This idea works especially well in:
- apartment corridors
- staircase landings
- narrow passage walls
- studio hallway transitions
- entry-to-living room paths
- end-of-hall focal walls
Why This Idea Is Useful
Hallways usually don’t have room for shelves or furniture, so vertical wall styling is the safest way to decorate.
This idea helps:
- add personal photos without heavy frames
- make long hallways feel less empty
- draw the eye upward
- create movement along the passage
- keep the floor completely clear
- make rental hallways feel intentional
This is especially practical for small apartments.
Best Tile Choice
Use lightweight adhesive photo tiles or foam-backed canvas tiles.
Best useful options:
- matte family photos
- travel prints
- black-and-white city shots
- minimal typography tiles
- soft neutral artwork
- pet photo tiles
These are easier to remove than glass frames.
Best Layout Rule
The most useful layout is vertical stacking or a slim staggered line.
Useful layout ideas:
- 3 vertical equal tiles
- 5-tile staircase rise layout
- 2 columns of slim tiles
- end-of-hall centered stack
Spacing guide:
- keep 2–3 inches between tiles
- align centerline at eye level
- maintain clean margins from door frames
This keeps the hallway elegant.
Practical Styling Tip
Use the gallery to visually guide movement.
Best flow idea:
- start with smaller tiles near the entrance
- use larger feature tile toward hallway end
- repeat one black or oak border finish
- keep tones consistent
This creates a smooth visual journey.
Wall Safety Tip
Hallway walls often face friction from bags and shoulders.
Useful safety rule:
- place tiles slightly higher than shoulder level
- avoid thick protruding frames
- keep corners rounded if possible
- use matte finish to hide fingerprints
This improves durability.
Mistake to Avoid
Avoid wide horizontal gallery layouts in narrow corridors.
This can make the hallway feel tighter.
Instead:
- use vertical stacking
- keep one side wall clear
- avoid overly busy colors
- leave enough negative space
A vertical photo tile gallery is highly useful because it adds personality, height, and movement to narrow rental hallways without using any floor space or permanent fixtures.
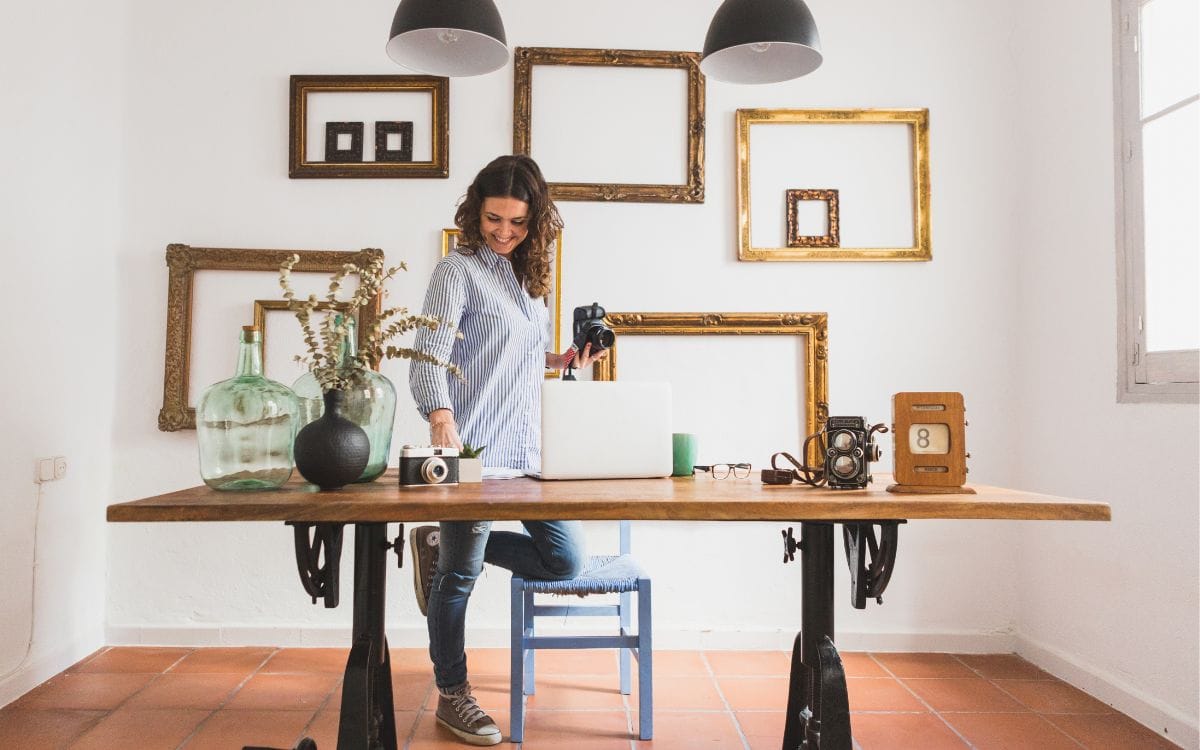
5. Home Office: Acoustic Fabric Panels with Velcro
Acoustic fabric panels attached with Velcro strips are one of the most practical renter-friendly wall upgrades for a home office. They improve sound quality, video-call backgrounds, and visual softness without drilling into the wall, making them ideal for work-from-home rentals.
This idea works especially well in:
- desk backdrop walls
- compact study corners
- bedroom office setups
- creator workstations
- client-call backgrounds
- podcast or recording corners
Why This Idea Is Useful
Rental home offices often have hard surfaces like painted walls, desks, screens, and tiled floors. This can create echo and make calls sound less clear.
This idea helps:
- reduce sound reflection
- improve call audio
- create a premium background behind the desk
- soften harsh plain walls
- make small work corners feel more intentional
- improve focus in echo-prone rooms
This is especially practical for freelancers and remote workers.
Best Panel Choices
Choose lightweight fabric-wrapped acoustic foam or felt panels.
Best useful options:
- neutral linen-look felt panels
- square velvet acoustic tiles
- slim wool blend panels
- ribbed fabric acoustic strips
- hexagon soft panels
- minimalist rectangular felt boards
Neutral tones work best for professional calls.
Best Placement Rule
The most useful placement is behind the desk chair or on the side reflection wall.
Useful layout options:
- 3 vertical panels behind chair
- 2×2 square panel grid
- single wide horizontal strip behind monitor
- half-wall side panel beside desk
Keep the layout within desk width or slightly wider.
This keeps the background clean.
Practical Styling Tip
Connect the panel tone with the desk setup.
Best pairings:
- walnut desk
- black monitor arms
- neutral curtains
- leather desk mat
- bookshelf side wall
- warm task lamp
This makes the office feel cohesive.
Acoustic Performance Tip
For better real sound control:
- place one panel at ear height
- add a side-wall panel if echo remains
- combine with curtains or rug
- avoid placing directly behind open shelves only
This improves voice clarity.
Mistake to Avoid
Avoid bright colorful panels behind video-call setups.
This can distract clients or viewers.
Instead:
- use warm grey
- beige
- muted olive
- charcoal
- soft navy
Acoustic fabric panels with Velcro are highly useful because they improve sound quality, work focus, and professional video-call aesthetics while staying fully rental-safe.
6. Kitchen: Peel-and-Stick Backsplash Wall
A peel-and-stick backsplash wall is one of the most useful renter-friendly upgrades for a kitchen because it adds style, easy cleaning, and wall protection without permanent tile work. In rentals, the kitchen wall near the counter often looks plain or gets stained easily, so a removable backsplash solves both problems.
This idea works especially well in:
- apartment kitchens
- studio kitchenette walls
- sink backsplash zones
- coffee corners
- bar cart walls
- utility prep counters
Why This Idea Is Useful
Kitchen walls need décor that is both visual and functional. Standard art often doesn’t work well because of grease, steam, and splashes.
This idea helps:
- protect the wall from splashes
- make plain rental kitchens look upgraded
- create a premium tile effect
- improve wipeability
- zone the prep or coffee area
- hide older stained backsplash paint
This is especially practical in compact kitchens.
Best Backsplash Choices
Choose water-resistant removable vinyl or PVC tile sheets.
Best useful styles:
- white subway tile
- marble-look vinyl tile
- matte stone texture
- warm beige ceramic-look sheets
- herringbone peel tiles
- small mosaic accent strips
Simple patterns work best in small rental kitchens.
Best Placement Rule
The backsplash should stay only within the active prep zone.
Useful size guide:
- cover wall between countertop and upper cabinets
- extend behind coffee station or microwave
- stop before switchboards if needed
- align neatly with cabinet edges
This keeps the kitchen looking intentional.
Practical Styling Tip
Match the backsplash tone with the kitchen’s existing finishes.
Best pairings:
- white cabinets + grey tile
- wood shelves + beige stone look
- black appliances + marble-look tile
- brass accessories + warm neutral backsplash
This makes the rental kitchen feel cohesive.
Moisture & Heat Safety Tip
This is highly important for renters.
Useful safety rules:
- avoid direct contact with gas flame heat
- keep a safe gap from stove burners
- use extra pressure near sink splash zones
- dry wall fully before applying
- avoid textured damp paint
This improves durability and clean removal.
Mistake to Avoid
Avoid glossy bold patterns in tiny kitchens.
This can make the space feel busy.
Instead:
- choose matte neutral tiles
- keep grout lines simple
- use one backsplash style only
- repeat the tone in countertop accessories
A peel-and-stick backsplash wall is highly useful because it adds wall protection, easy maintenance, and a custom kitchen upgrade without permanent renovation.
7. Bathroom: Moisture-Safe Removable Art + Mirror
A moisture-safe removable art setup paired with a lightweight mirror is one of the best renter-friendly ways to style a bathroom wall. Bathrooms in rentals often feel cold and unfinished because people avoid decorating humid walls, but the right materials can add warmth, function, and personality without damage.
This idea works especially well in:
- powder rooms
- vanity walls
- sink-side empty walls
- guest bathrooms
- compact apartment washrooms
- half-bath rentals
Why This Idea Is Useful
Bathrooms need décor that can handle humidity and still remain easy to remove.
This idea helps:
- make the bathroom feel less clinical
- add a functional mirror for daily use
- brighten darker washrooms
- reflect light to make the room feel bigger
- personalize the vanity zone
- style unused side walls without drilling
This is especially practical in small rental bathrooms.
Best Art + Mirror Choices
Choose lightweight and humidity-safe materials.
Best useful options:
- acrylic framed prints
- laminated typography art
- PVC-backed mini prints
- lightweight arched acrylic mirror
- slim fog-resistant adhesive mirror
- removable mirrored tiles
Avoid paper-only frames in humid bathrooms.
Best Placement Rule
The safest zones are away from direct shower steam and splash lines.
Useful layout ideas:
- mirror centered above sink
- one slim print beside mirror
- 2 stacked waterproof prints on side wall
- mini mirror tile grid above towel hook
Keep all pieces above regular splash height.
This improves durability.
Practical Styling Tip
Use décor that connects with vanity finishes.
Best pairings:
- black tapware + black frame mirror
- wood vanity + beige typography art
- brass fixtures + arched gold mirror
- white sink + soft neutral prints
This makes the bathroom look intentional.
Moisture Safety Tip
This is the most important renter rule here.
Useful steps:
- apply only on dry tiles or sealed paint
- avoid shower-facing walls
- use humidity-safe adhesive strips
- check corners weekly for lifting
- wipe condensation regularly
This helps prevent peeling.
Mistake to Avoid
Avoid fabric, canvas, or untreated wood art in bathrooms.
These can absorb moisture and warp.
Instead:
- use acrylic
- PVC
- laminated prints
- removable mirror tiles
A moisture-safe removable art and mirror setup is highly useful because it adds daily function, reflected light, and bathroom personality while staying safe in humid rental conditions.
8. Dining Area: Oversized Leaning Canvas on Sideboard
An oversized leaning canvas placed on a sideboard is one of the easiest renter-friendly ways to style a dining wall without drilling. It creates an editorial, designer look while keeping the setup fully portable, making it ideal for rentals where heavy frames or wall anchors are not allowed.
This idea works especially well in:
- dining room sideboards
- breakfast nooks
- open-plan dining corners
- bar cart walls
- apartment console walls
- studio dining zones
Why This Idea Is Useful
Dining walls are often large and visible, but renters hesitate to hang heavy art there. A leaning canvas solves that by using the furniture for support.
This idea helps:
- create a large focal point without drilling
- make the dining zone feel premium
- fill wide blank walls with one piece
- avoid multiple small frames
- make styling easy to move
- add depth behind a sideboard or bar cart
This is especially practical in open-plan apartments.
Best Canvas Choice
Choose a lightweight oversized stretched canvas or framed foam board print.
Best useful styles:
- abstract neutral art
- soft line artwork
- black-and-white photography
- warm textured canvas
- minimal landscape
- oversized typography print
Large simple art works better than busy designs.
Best Placement Rule
The canvas should rest securely on the sideboard top and lean gently against the wall.
Useful size guide:
- width should be 50–70% of sideboard width
- height should visually rise above nearby chairs
- leave small side margins for balance
- keep the base stable with décor blockers if needed
This keeps the wall elegant.
Practical Styling Tip
Style the canvas with low-profile décor in front.
Best pairings:
- ceramic vase
- candles
- stacked books
- tray
- glass bowl
- small table lamp
Keep front décor lower than the canvas edge.
This preserves the artwork impact.
Safety Tip
This is important in dining zones.
Useful safety rules:
- use anti-slip pads under frame
- keep away from chair movement path
- avoid unstable thin sideboards
- use optional removable anti-tip tab
This improves renter safety.
Mistake to Avoid
Avoid using multiple leaning frames of different heights on a small sideboard.
This can look messy.
Instead:
- use one oversized hero piece
- keep supporting décor minimal
- repeat dining room color tones
- choose matte finishes
An oversized leaning canvas on a sideboard is highly useful because it creates a premium dining focal wall, zero-drill styling, and easy portability for future moves.
9. Reading Nook: Macramé + Plug-In Sconce Wall
A macramé wall hanging paired with a plug-in sconce is one of the most practical renter-friendly ways to turn a small reading nook into a cozy, intentional corner. It adds soft texture, warm lighting, and vertical interest without needing any hardwired electrical work or drilling.
This idea works especially well in:
- bedroom reading corners
- living room side chairs
- balcony seating nooks
- window bench corners
- studio relaxation zones
- tea or coffee corners
Why This Idea Is Useful
Reading nooks need more than just a chair—they need visual warmth and task lighting to feel usable.
This idea helps:
- create a cozy wall backdrop
- add texture without heavy art
- provide focused reading light
- define a relaxation zone
- make empty corners feel styled
- improve evening usability
This is especially practical in small rentals where corners are often unused.
Best Macramé Choice
Choose a medium-size lightweight cotton or jute macramé hanging.
Best useful styles:
- neutral cotton knots
- half-moon macramé
- vertical fringe hanging
- geometric rope weave
- cane + cotton mix
Neutral textures work best for calming corners.
Best Plug-In Sconce Placement
The safest renter option is a wall-mounted plug-in sconce attached with removable hooks or adhesive light mounts.
Useful placement guide:
- place the sconce slightly above shoulder height when seated
- keep it on the reading-hand side
- hide the cord with removable cord clips
- route plug wire behind chair or bench edge
- keep switch easy to reach
This makes the nook more functional.
Practical Styling Tip
Layer the wall décor with soft seating materials.
Best pairings:
- boucle accent chair
- linen cushion
- floor pouf
- small side table
- throw blanket
- book stack
This makes the corner feel complete.
Lighting Tip
Choose warm light for comfort.
Best bulb direction:
- soft downward glow
- angled reading beam
- warm white LED
- glare-free shade
This helps reduce eye strain while reading.
Mistake to Avoid
Avoid large dark wall art in a small reading corner.
This can make the nook feel heavy.
Instead:
- use one light macramé piece
- keep the sconce slim
- use neutral fabric texture
- maintain open wall space around the chair
A macramé wall hanging with a plug-in sconce is highly useful because it creates a cozy renter-safe reading nook with both texture and functional lighting.
10. Balcony or Utility Wall: Vertical Plant Grid
A vertical plant grid is one of the most useful renter-friendly ways to style a balcony or utility wall because it adds greenery, privacy, and visual height without taking up floor space. In small rentals, balconies and utility zones are often narrow, so using the wall vertically keeps the area functional.
This idea works especially well in:
- apartment balconies
- utility wash areas
- laundry corners
- tea seating balconies
- studio outdoor ledges
- narrow service walls
Why This Idea Is Useful
Balconies and utility walls are usually overlooked, yet they can become the most relaxing part of a rental when styled well.
This idea helps:
- create a green vertical focal wall
- improve privacy from nearby buildings
- free up floor walking space
- make laundry areas feel less plain
- define a tea or seating corner
- add life to hard concrete walls
This is especially practical in compact city apartments.
Best Grid Choice
Choose a freestanding metal grid, tension-rod mesh, or lightweight wall grid with removable hooks.
Best useful options:
- black wire grid panel
- bamboo lattice screen
- slim metal trellis
- over-the-railing vertical planter rack
- foldable plant stand grid
Freestanding or tension-supported options are safest for renters.
Best Plant Choices
Use lightweight and low-maintenance plants.
Best useful options:
- pothos
- spider plant
- English ivy
- faux trailing vines
- herb planters
- succulents in clip pots
- money plant
Choose plants based on balcony sunlight.
Best Placement Rule
The grid should stay on the least-used wall or railing side.
Useful placement guide:
- keep the lower zone clear for mopping
- avoid blocking AC drainage pipes
- place behind tea chair or stool
- keep height taller than seating for privacy
- use corner placement for narrow balconies
This improves both function and aesthetics.
Practical Styling Tip
Layer the plant wall with lifestyle use.
Best pairings:
- folding tea chair
- small round table
- warm fairy lights
- outdoor cushion
- slim storage basket
- watering can corner
This turns the balcony into a useful retreat.
Water Safety Tip
This is highly important in rentals.
Useful rules:
- use drip trays under pots
- avoid direct water stains on painted walls
- keep heavy pots on lower hooks
- check rust resistance on metal grids
- use UV-safe faux plants for hot balconies
This protects both walls and flooring.
Mistake to Avoid
Avoid overcrowding the grid with heavy ceramic planters.
This can become unsafe.
Instead:
- use lightweight plastic or fiber pots
- keep spacing between plants
- allow sunlight gaps
- mix real and faux greenery
A vertical plant grid is highly useful because it creates a greener, more private, and better-zoned balcony wall without using valuable rental floor space.
Best Room-by-Room Styling Rules for Rental Walls
Renter-friendly wall décor works best when each room follows simple placement, scale, and safety rules. These rules help every wall look intentional while staying easy to remove when the lease ends.
1) Match Wall Décor Width to Nearby Furniture
The wall piece should visually connect with the furniture below it.
Useful size guide:
- sofa wall → around 2/3 of sofa width
- bed wall → match mattress or headboard width
- sideboard wall → 50–70% of furniture width
- desk backdrop → match desk width
- hallway → use vertical stacking instead of width
This keeps the wall balanced.
2) Use One Focal Wall Per Room
Small rentals can feel crowded quickly.
Best rule:
- choose one hero wall
- keep surrounding walls lighter
- avoid multiple wallpaper walls in one room
- use one oversized décor piece instead of many small items
This keeps the apartment visually calm.
3) Use Vertical Styling in Narrow Spaces
Hallways, entryways, balconies, and utility walls should use height.
Best vertical ideas:
- photo tile stacks
- narrow mirrors
- plant grids
- hallway textile strips
- slim removable shelves
This saves walking space.
4) Match the Décor to Room Conditions
Different rooms need different materials.
Useful matching:
- kitchen → wipeable vinyl
- bathroom → acrylic and moisture-safe mirror
- bedroom → soft fabric
- office → acoustic felt
- balcony → UV-safe greenery
This improves durability.
5) Keep Heavy Décor Off Adhesive Strips
This is one of the most important rental safety rules.
Best alternatives:
- leaning mirrors
- sideboard canvas
- floor art
- freestanding grids
- tension-rod textiles
This lowers paint damage risk.
6) Repeat Colors Across Rooms
Repeating tones makes the rental feel cohesive.
Useful repetition:
- black frame accents
- oak wood finishes
- linen neutrals
- warm beige wallpaper
- muted green balcony plants
This improves flow room to room.
7) Maintain Walking Clearance
Rental walls should never reduce movement.
Avoid:
- thick protruding frames in hallways
- low hanging décor near chairs
- large mirrors in door swing zones
- balcony grids blocking AC access
This keeps the home functional.
8) Keep Everything Portable
The best rental wall styling moves easily.
Choose:
- removable wallpaper
- adhesive photo tiles
- leaning mirrors
- plug-in sconces
- tension-rod headboards
- foldable plant grids
This makes shifting homes easier.
The best room-by-room styling rules focus on scale, safety, portability, and room-specific materials so every wall feels premium without risking the deposit.
Common Renter Mistakes to Avoid
Renter-friendly wall décor only works well when the setup protects the wall, suits the room, and stays easy to remove. A few common mistakes can lead to paint peeling, cluttered walls, unstable décor, or lost security deposits.
Avoid these practical errors.
1) Using the Wrong Adhesive for the Wall Type
Not every strip works on every surface.
Common problem:
- weak tape on matte paint
- wallpaper on textured plaster
- cheap glue on humid bathroom walls
- heavy hooks on old peeling paint
Useful fix:
- smooth paint → Velcro strips
- tile → removable adhesive pads
- fabric wall → tension rod
- large art → leaning setup
Always match the tool to the wall finish.
2) Hanging Heavy Mirrors with Adhesive Only
This is one of the biggest renter mistakes.
Problem:
- strip failure
- cracked mirror
- paint damage
- safety risk near entryways
Useful fix:
- use leaning full-length mirrors
- use anti-slip floor pads
- optional removable anti-tip tab
- keep away from door swing path
This is much safer.
3) Overdecorating Small Rental Walls
Too many small pieces make rentals feel busy.
Common signs:
- multiple tiny frames above sofa
- several decals in every room
- too many hallway tiles
- mixed wall colors in one space
Useful fix:
- one focal wall per room
- use one oversized hero piece
- repeat one frame finish
- keep nearby walls plain
This improves visual calm.
4) Ignoring Humidity in Kitchen and Bathroom
Moisture can weaken adhesives quickly.
Problem zones:
- shower-facing walls
- near sink backsplash
- balcony rain walls
- AC condensation corners
Useful fix:
- use acrylic art
- PVC tiles
- removable mirror tiles
- moisture-safe vinyl
This improves durability.
5) Hanging Décor Too High
Poor height placement disconnects the décor from furniture.
Useful fix:
- sofa wall → 6–8 inches above sofa
- bed wall → align with headboard height
- sideboard art → just above styling items
- hallway tiles → centered at eye level
Proper height improves cohesion.
6) Blocking Functional Zones
Wall décor should never interfere with daily use.
Avoid:
- balcony plant grid blocking drainage
- office panels covering shelves
- hallway frames at shoulder level
- kitchen backsplash over sockets
- mirrors in wardrobe swing zones
This keeps the rental practical.
7) Choosing Non-Portable Décor
Some renters buy pieces that only fit one apartment.
Useful fix:
- choose flexible wallpaper widths
- use movable leaning art
- buy foldable plant grids
- use removable photo tiles
- choose plug-in lighting
This makes moving easier.
Avoiding these mistakes helps renters create walls that feel safe, stylish, portable, and deposit-friendly in every room.
Luxury Rental Styling Tips
Rental walls can still look premium when the styling focuses on oversized pieces, warm lighting, tonal palettes, and clean no-damage installation methods. Luxury rental décor is less about expensive items and more about creating intentional focal points with portable, high-impact styling.
1) Use One Oversized Statement Piece Per Room
A single large décor element always feels more elevated than many small pieces.
Best luxury options:
- oversized leaning mirror in entryway
- large canvas on dining sideboard
- peel-and-stick linen accent wall behind sofa
- full-width fabric headboard wall
- tall balcony plant grid
This gives each room a custom-designed look.
2) Choose Tonal Neutral Color Palettes
Luxury rentals feel calmer with layered neutrals.
Best shades:
- warm beige
- taupe
- greige
- muted olive
- stone grey
- soft black accents
- oak wood tones
These colors work across most rental finishes.
3) Add Warm Plug-In Lighting
Lighting instantly elevates rental walls.
Best renter-safe options:
- plug-in sconces
- warm LED picture lights
- soft mirror side lamps
- desk task light on acoustic wall
- fairy lights on balcony plant grid
Warm light adds depth and softness.
4) Use Texture Instead of Too Much Color
Premium rentals often rely on texture more than bold color.
Best texture upgrades:
- linen-look removable wallpaper
- velvet acoustic panels
- cotton macramé
- woven balcony greenery
- matte canvas art
- soft fabric headboard panels
This keeps the apartment sophisticated.
5) Repeat Materials Across Rooms
Luxury styling feels stronger when the same finish appears in multiple rooms.
Best repetition ideas:
- black mirror frames
- walnut desk + dining frame
- linen wallpaper + bedroom fabric panel
- brass plug-in sconces
- matching acrylic bathroom mirror accents
This improves whole-home flow.
6) Keep Negative Space Around Focal Walls
Premium styling needs breathing room.
Useful rule:
- one wallpaper wall = keep side walls plain
- one leaning mirror = clear floor space nearby
- one oversized canvas = minimal sideboard styling
This makes the statement piece stronger.
7) Use Portable Designer-Look Layers
The most luxurious rental walls combine easy-to-move layers.
Best layering ideas:
- leaning mirror + slim bench
- sideboard canvas + ceramic vase
- desk acoustic wall + bookshelf
- macramé + plug-in sconce + boucle chair
This creates an editorial look without permanent changes.
Luxury rental styling works best when it combines oversized focal pieces, warm layered lighting, texture-rich neutrals, and portable décor that can move to the next home easily.
Conclusion
Room-by-room renter-friendly wall décor proves that you don’t need drilling, painting, or permanent changes to make a rental feel like home. The most effective approach is choosing the right no-damage solution for the function of each room.
A living room benefits from a peel-and-stick accent wall, while the bedroom feels softer with a fabric headboard wall. Entryways work best with leaning mirrors, hallways need vertical photo tiles, kitchens need wipeable backsplash panels, and balconies become more inviting with a vertical plant grid.
The key is to match every wall idea with:
- the room’s daily use
- wall surface type
- humidity level
- décor weight
- available floor space
- portability for future moves
For the best renter-safe results:
- use removable hooks and Velcro strips
- avoid heavy décor on adhesives
- choose moisture-safe materials in kitchens and bathrooms
- keep one focal wall per room
- repeat colors and materials across spaces
- maintain clear walking zones
- prioritize portable pieces you can reuse in your next apartment
If you want a more premium look, focus on oversized statement pieces, warm plug-in lighting, linen textures, neutral palettes, and negative space around focal walls.
When done right, renter-friendly wall décor can improve style, zoning, function, and comfort in every room while fully protecting your security deposit.